Starting an online store can be intimidating, but Shopify makes it easy. In this section, we will walk you through the simple steps involved in setting up your first basic store on Shopify. We will take a tour of the admin and show you how to get around within it and introduce you to the features that will help you develop and run your online store.
Start with a free-trail
Let’s open up the Shopify website (http://www.shopify.com). In the field at the top of the home page, click on “Start free trail” button to Get Started.
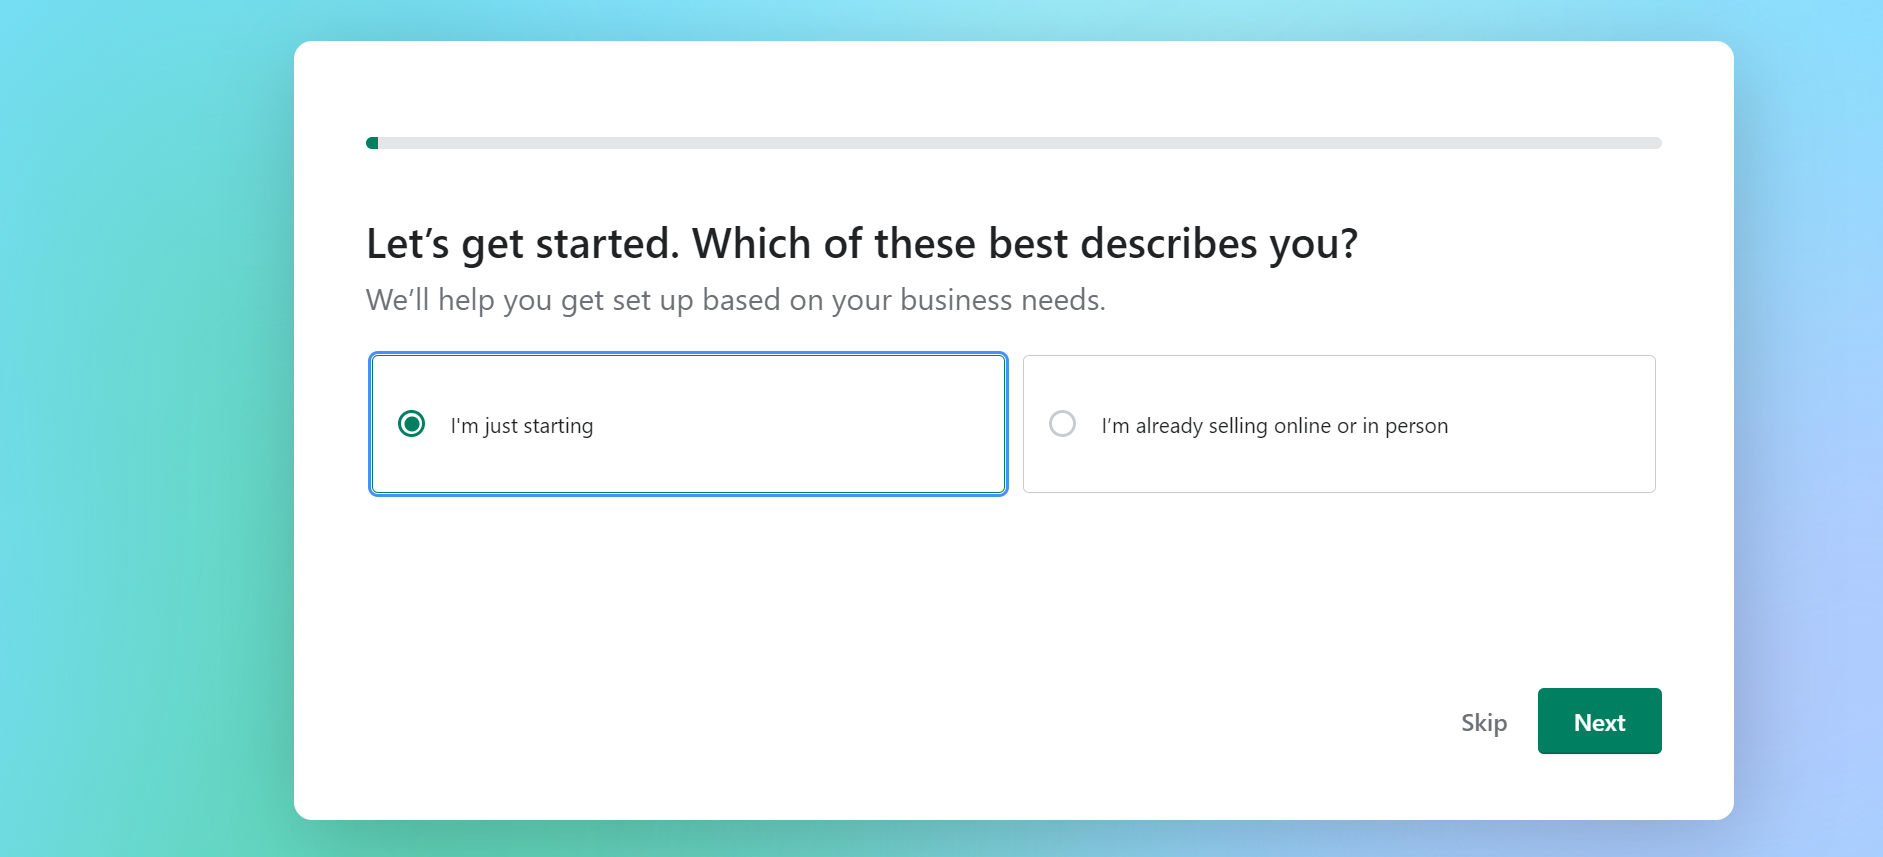
Select your online business presence as appropriate and go Next
You will be requested to select your Market place that you think best suit for your business. This can be extended or limited in future too.
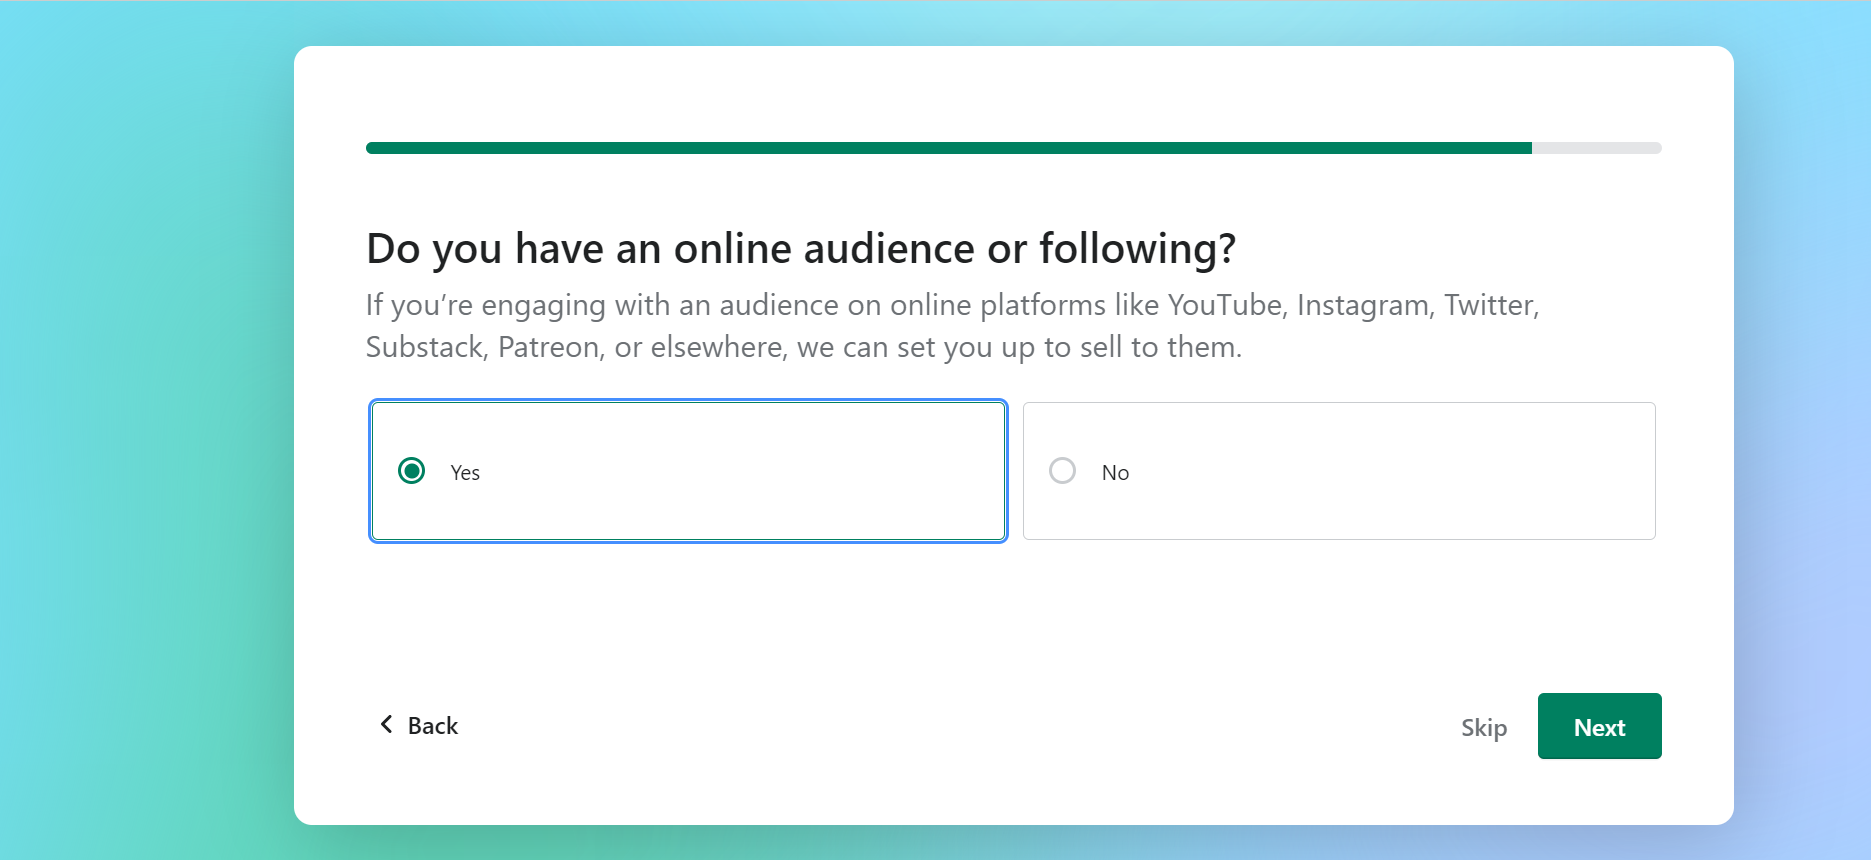
Now, choose your product to be sold in this online store

Shopify comes with the feature to extend your business directly through popular online platforms such as YouTube, Instagram, etc. However, you can select No to limit the audience for your portal or keep it with your customers.
Name your eCommerce portal

Now, pick your Region of sales

Create shopify ID

Shopify Admin
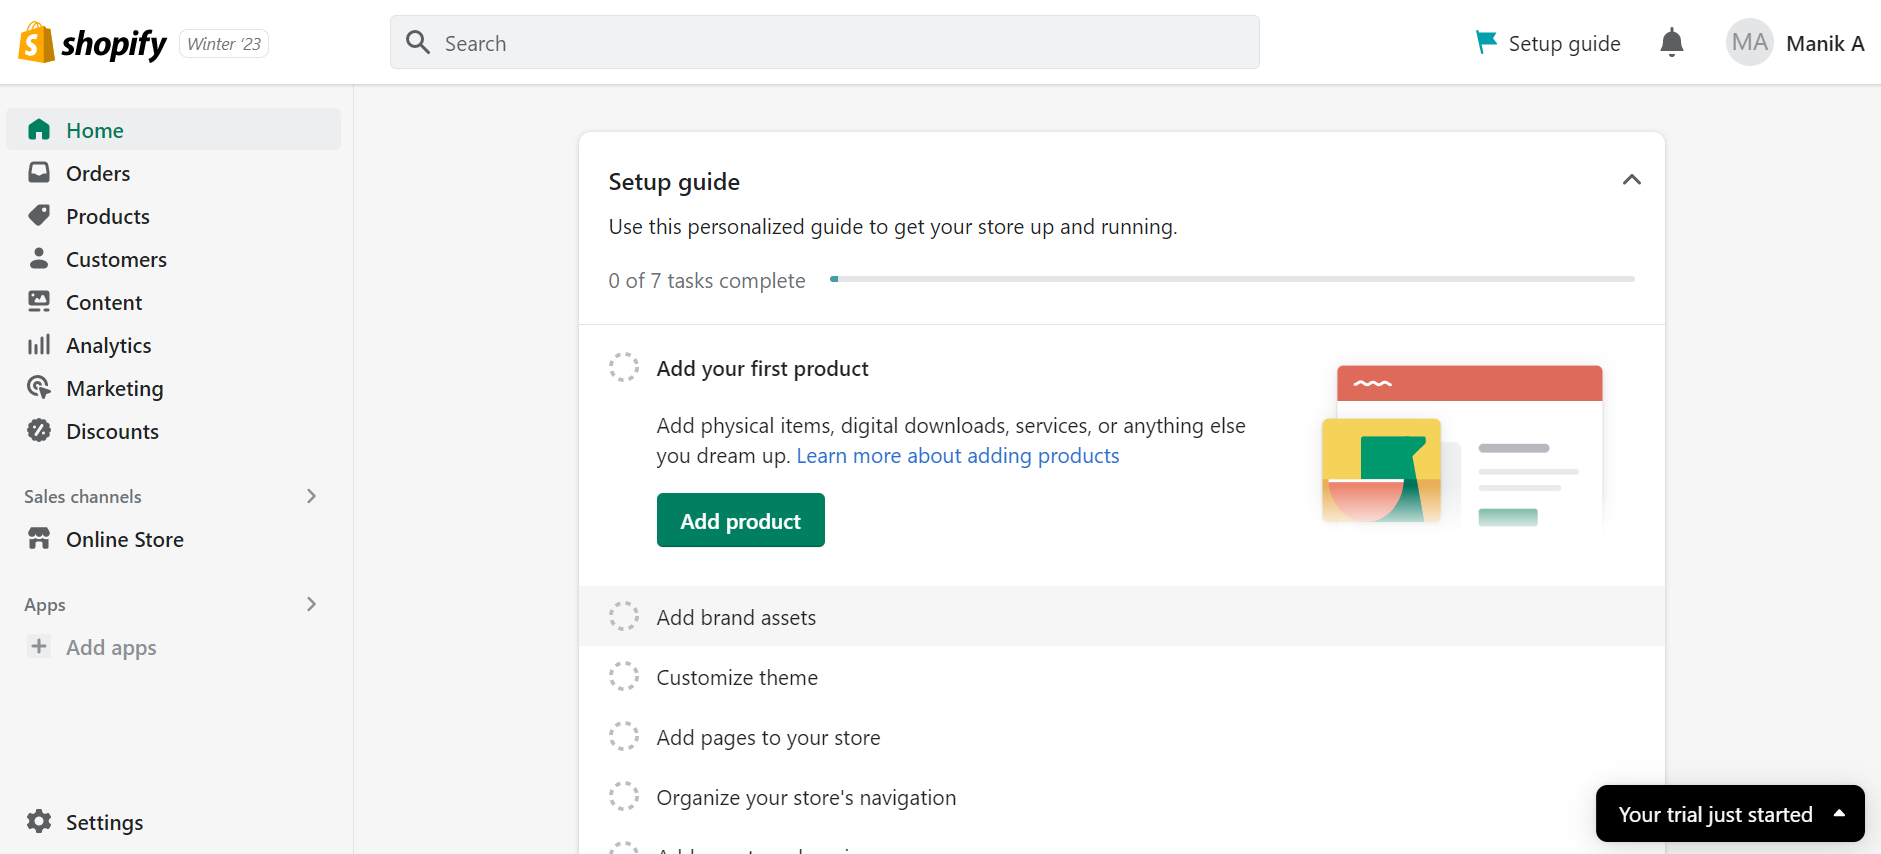
Welcome to your store admin! It is from here that you will develop and run your store. Your free trial of Shopify has now begun. Let’s take a look at the different elements on this page, starting with the navigation.
The main navigation panel
This is the black panel to the left of the page in your admin. Using this panel, you can access (or navigate to) all the most important sections of the admin. The current section will be slightly highlighted. In the screenshot above, I’m in the “Home” section so you can see that highlighted in the navigation. Let’s do a quick tour of the admin.
Add your first Product: At the beginning of the page, you will see a little box with ‘Add product’. Clicking on this icon will open the home page of your store in a new window or tab in your browser. Click it and fill the details!
Add brand assets: Select your brand, company logo, colors/themes that best fit with your company.
Customize theme: A theme sets the organization, features, and style of your online store. Different themes have different styles and layouts, and offer a different experience for your customers.
Add Pages to your store: Create pages that describe who you are and how people can contact you. Pages contain information that rarely changes or that customers will reference often, like an "About Us" page or a "Contact Us" page.
Organize your store's navigation: When you're setting up your online store, you should think about how you want customers to find your products and information about your business. Every theme has a different design, so the navigation looks different in different themes.\
Add a custom domain: Adding a custom domain to your store helps grow your brand and increases customer trust. Stores with custom URLs are more likely to succeed.
Set up Shopify Payments: With Shopify Payments you're automatically set up to accept all major payment methods as soon as you create your Shopify store.
Connect with our team today to discuss opportunities, possibilities & how you can acquire our services to make business the one!


